![]()
|
|
|
Home | Cho's Place | Classroom | News | Contact |
|
|
|
|
|
Welcome to M.E.'s online classroom. We're in the News!
This page is designed to complement your classroom experiences and to assist the language learning process. Please visit regularly for updates and new resources.
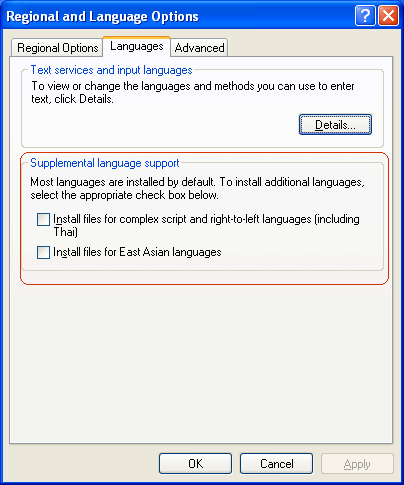
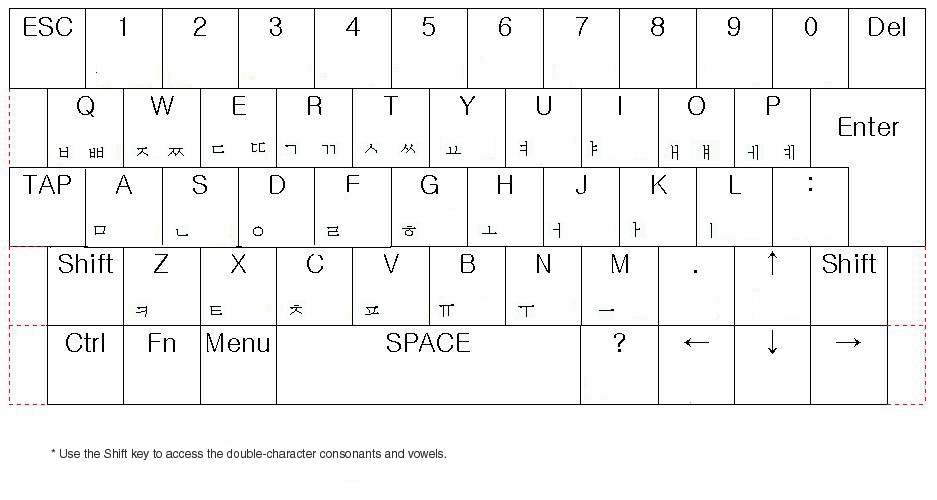
KOREAN KEYBOARD LAYOUT
Instructions for adding Korean language support on your computer:
With multiple languages and keyboards/Input Method Editors (IMEs)
installed on your computer, you can compose documents that contain
more than one language. Any recipients of multilingual documents must
also have the same languages installed on their computers to read or
edit the documents.Add Language Support
NOTE:
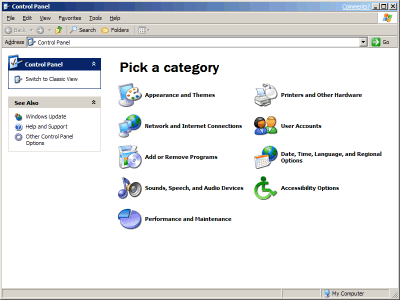
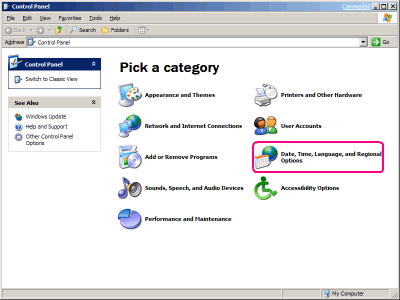
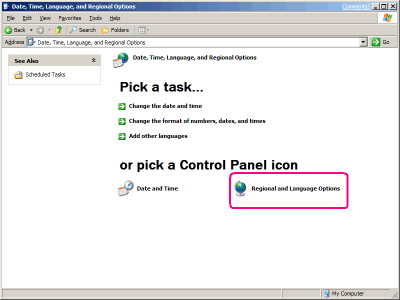
To perform this procedure, you must be a member of the Administrators group on the local computer, or you must have been delegated the appropriate authority. If the computer is joined to a domain, members of the Domain Admins group might be able to perform this procedure. 1. Go to Control Panel.
To find out which language collection to install to support the language(s) you need, see Windows XP - List of Locale IDs, Input Locale, and Language Collection 7. Click OK or Apply. You will prompted to insert the Windows CD-ROM or point to a network location where the files are located. After the files are installed, you must restart your computer. To remove the language files, clear the check box beside the applicable collection, and then click OK or Apply.
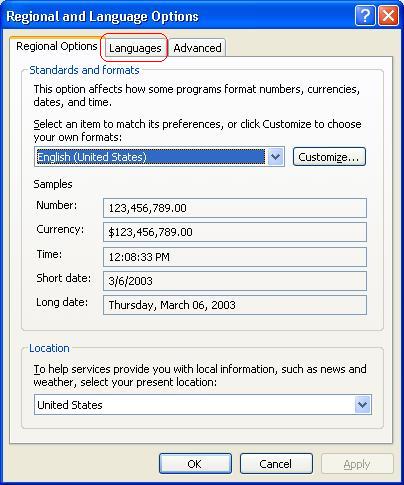
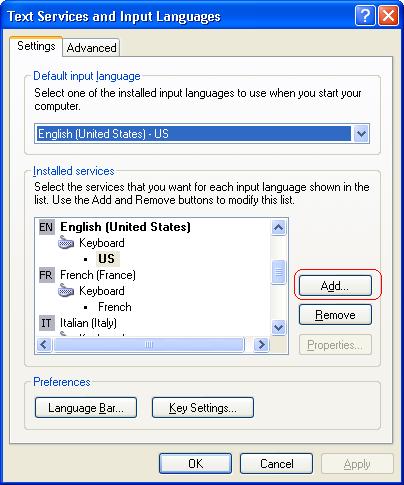
Add Keyboard/Input Method Editor1. Follow steps 1 - 5 from above. 2. Under "Text services and input languages," click on the "Details..." button.
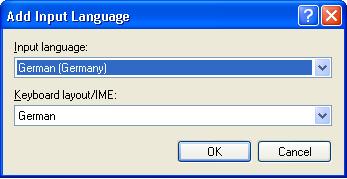
4. In the Add Input Language dialog box, click the input language and keyboard layout or Input Method Editor (IME) you want to add.
5. You should now see a language indicator in the System Tray (located at bottom right hand corner of the desktop by default)
NOTE: You can switch between different input methods by
pressing the left Alt + Shift keys or the right Alt + Shift keys
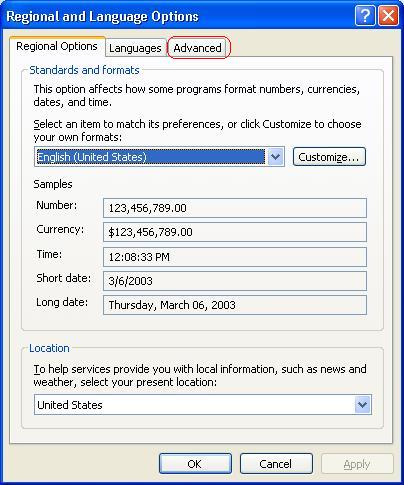
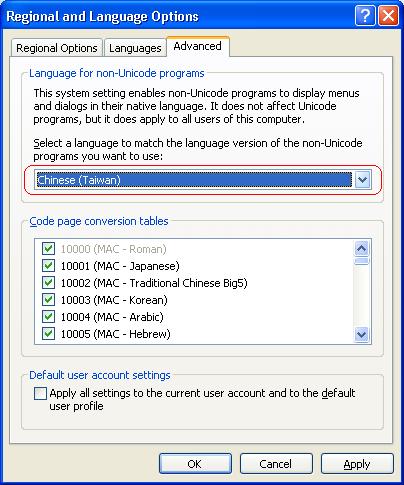
Changing Language for non-Unicode ProgramsAlso known as "System Locale" in Windows 2000. This setting enables programs that do not support Unicode to display menus and dialog boxes in their native language by installing the necessary code pages and fonts. However, programs designed for other languages may not display text correctly.
NOTES:
1) To perform this procedure, you must be a member of the Administrators group on the local computer, or you must have been delegated the appropriate authority. If the computer is joined to a domain, members of the Domain Admins group might be able to perform this procedure. 2) Only non-Unicode programs are affected by this setting. The language you select for this option does not change the menus and dialog boxes of Windows or other Unicode programs. 1. Follow steps 1 - 4 from above. 2. Click on the "Advanced" tab
5. Follow the on-screen instructions. You will be prompted to reboot the system. Click Yes to complete the change. |
|||
|